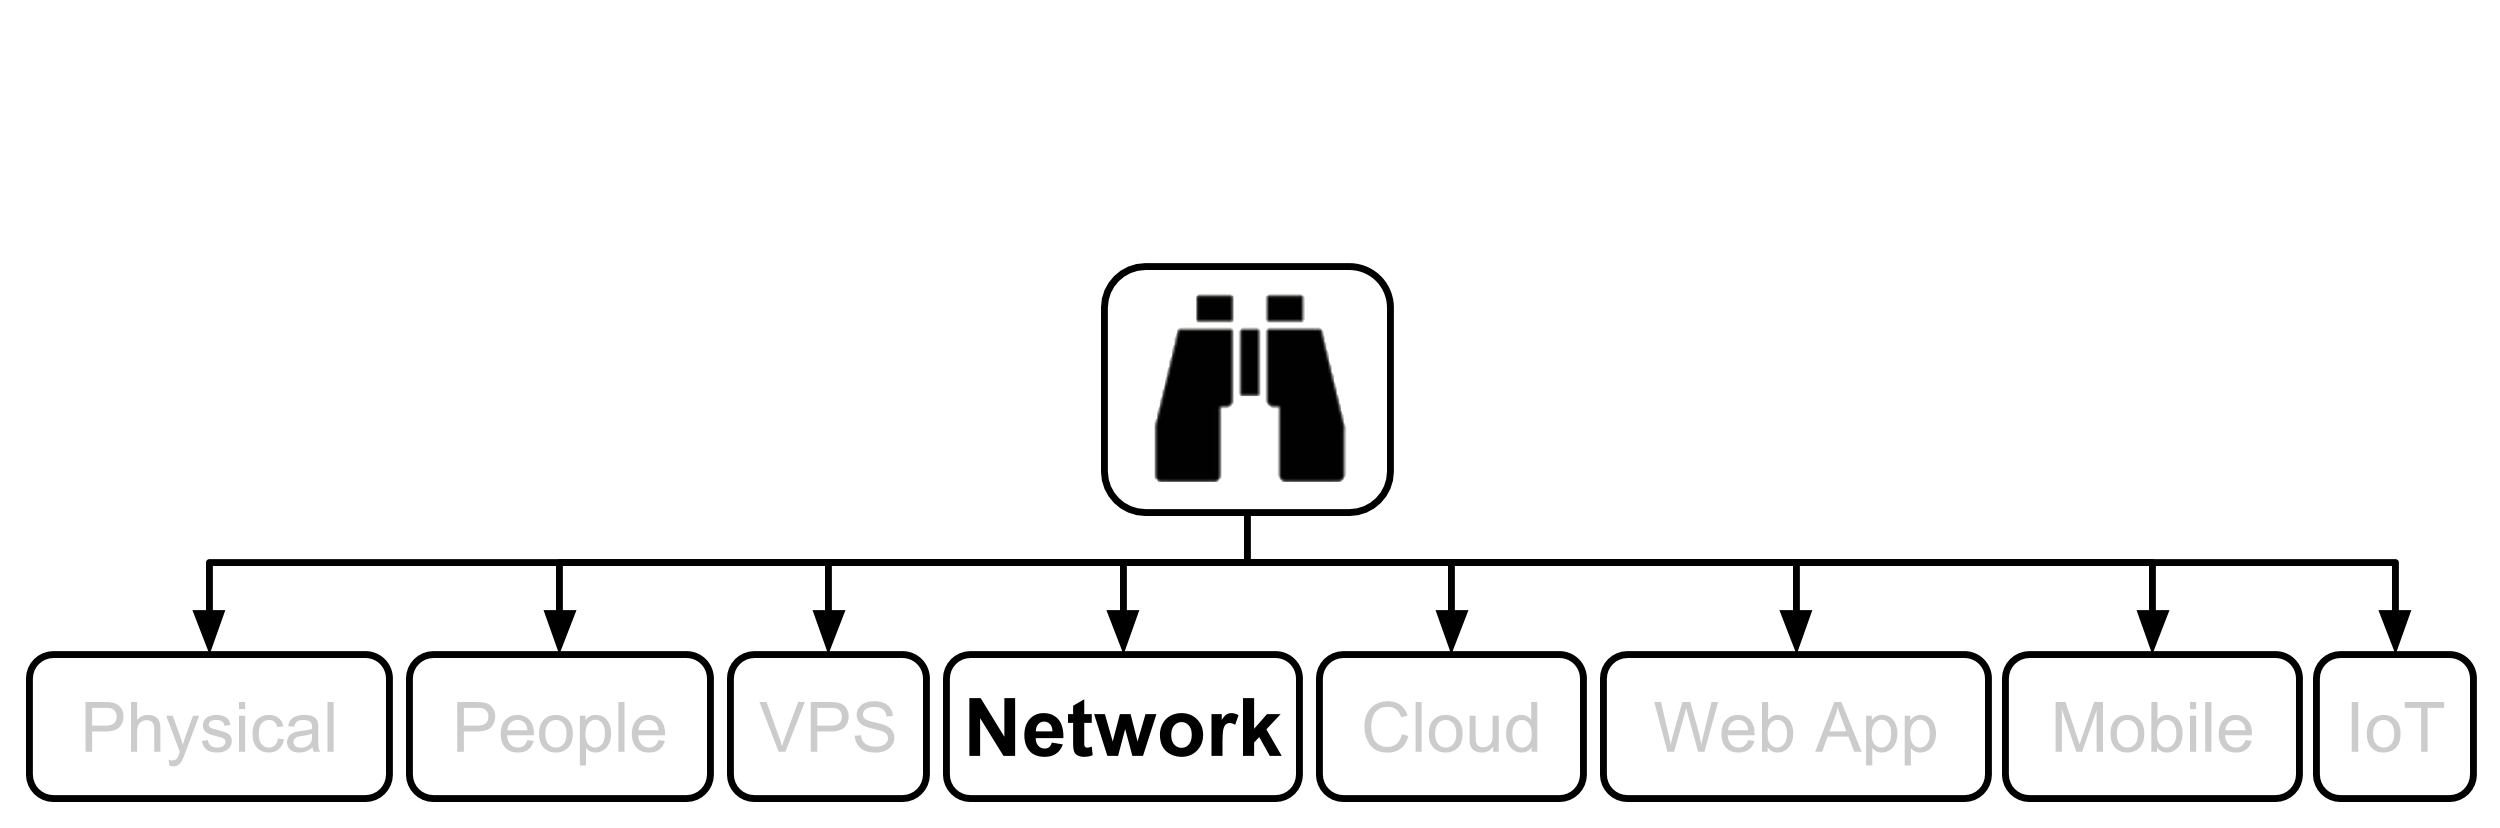
8. Network
I had the pleasure of interviewing Haroon Meer on Software Engineering Radio for a show on Network Security. Do your self a favour and listen to it. We cover most of the topics in this chapter plus more. While you are at it, check out the great Thinkst tools, also discussed near the end of the show:
1. SSM Asset Identification
Take results from the higher level Asset Identification section of the 30,000’ View chapter of Fascicle 0. Remove any that are not applicable. Add any newly discovered.
Here are some possibilities to get you started:
- Switches: Mainly because of the data that passes through them.
- Routers and layer 3 switches: Same as above, plus there will be a lot of sensitive network related information stored here.
- Syslog servers: For similar reasons to routers, plus events and sensitive information from all sorts of systems collected in one place.
- Visibility into what is actually happening in the communications between devices on your network.
There will almost certainly be many others. Think about your network topology. What information is stored where and over which channels it may pass. If you have decided to hand your precious data over to a Cloud Service Provider (CSP), then you are not going to have much control over this and in most cases, your CSP will not have as much control as you would like either, we address this in the Cloud chapter. Also think about the areas that may be easier to compromise than others and take this information into the next step.
2. SSM Identify Risks
Go through the same process as we did at the top level Identify Risks section in the 30,000’ View chapter of Fascicle 0, but for the network.
Most types of security exploitation have a network involved somewhere. Reconnaissance generally utilises the internet at a minimum. Application security generally requires a network in order to access the target application(s). Cloud security similarly depends on a network in order to access the target resources. Social Engineering as discussed in Fascicle 0 leverages a network of people in order to access the human target. Even physical security (also discussed in Fascicle 0) often involves different types of networks. When we think of networks, try not to be constrained to computer networks.
I also discussed Network Security with Haroon Meer on a Software Engineering Radio show, which is well worth a listen during evaluation of both risks and countermeasures.
Fortress Mentality

This section takes the concepts from the section with the same name from the Physical chapter in Fascicle 0. The largest percentage of successful attacks come from within organisations. Usually the inside attacks get covered up, because the public image of the organisation is affected to a greater extent than if the organisation publicises the fact that they were compromised by someone on the other side of the world.
There is somehow still a misnomer that having perimeters will save us from the attackers. They may stop some of the noise from unmotivated attackers, but usually not a lot more.
IBM X-Force 2016 Cyber Security Intelligence Index provides the following information for 2014 and 2015, plus a lot more:
2014:
Industries that experienced the highest incident rates were as listed descending:
- Financial services
- Information and communication
- Manufacturing
- Retail and wholesale
- Energy and utilities
- 55% of all attacks were carried out by insiders
- 31.5% were malicious inside actors
- 23.5% were inadvertent inside actors
2015:
Industries that experienced the highest incident rates were as listed descending:
- Healthcare
- Manufacturing
- Financial services
- Government
- Transportation
- 60% of all attacks were carried out by insiders
- 44.5% were malicious inside actors
- 15.5% were inadvertent inside actors
The 2017 IBM X-Force Threat Intelligence Index provides the following information for 2016, plus a lot more:
Industries that experienced the highest incident rates were as listed descending:
- Financial services
- Information and communications
- Manufacturing
- Retail
- Healthcare
In 2017 X-Force segregated the data. in 2016:
- 30% of all attacks were carried out by insiders
- 7% were malicious inside actors
- 23% were inadvertent inside actors
In saying that, Financial services was:
- 58% of all attackers were carried out by insiders
- 5% were malicious inside actors
- 53% were inadvertent inside actors
Healthcare was:
- 71% of all attackers were carried out by insiders
- 25% were malicious inside actors
- 46% were inadvertent inside actors
Malicious inside actors can be disgruntled employees that may or not have left the organisation and still have access via an account or a back door they introduced or know about, they could also be opportunists looking to make some extra money by selling access or private information.
An inadvertent inside actor is usually someone that does not mean to cause harm, but falls prey to social engineering tactics often from malicious outsiders, as touched on in the People chapter of Fascicle 0. These are attacks such as phishing, or somehow being tricked or coerced into revealing sensitive information or carrying out an activity that will provide the attacker a foothold. The Social Engineer’s Playbook by Jeremiah Talamantes has many very useful and practical examples.
In all cases in 2016, we saw a significant trend of the inside actors shifting to the inadvertent, essentially this points to an emphasis on exploiting the organisations people (social engineering) with various attack strategies.
This clearly shows, that although our technological defences are improving slowly, our people are much slower to improve. Spending resources on areas such as network perimeters while neglecting our most valuable assets (our people), does not make sense.
Often workers bring their own devices to work, and bring their work devices home and back, potentially transferring malware from network to network, whether they be wired or wireless. Again though, people are the real issue here. No matter how good your technological solution is, people will circumvent it.
Lack of Segmentation

Similar to the “Overly Permissive File Permissions, Ownership and Lack of Segmentation” section in the VPS chapter, here we focus on the same concept but at the network layer.
Network segmentation is the act of splitting a network of computers that share network resources into multiple sub networks, whether it be real via routers, layer three switches, or virtual via VLANs.
Without segmentation, attackers once on the network have direct access to the resources on that network.
Having all or many resources from different trust boundaries on a monolithic network does nothing to constrain attackers or the transfer of malware. When we talk about trust boundaries we are talking about a configured firewall rather than just a router. A router routes, a firewall should deny or drop everything other than what you specify. That is right, it requires some thought of what should be allowed to enter the gateway interface and how it is then treated.
A good example of lack of segmentation is what is currently happening with the explosion of IoT devices. Why would your house-hold appliances need to be on the internet other than to perform unnecessary tasks, like a fridge ordering food, or an oven being able to tell you when your dinner is cooked, or worse, providing functionality to turn the appliance on and off, or worse still, being commandeered by attackers to do their bidding which is quite common now for home appliances that have next to no consciousness of security. Even if these functions were considered important enough to reveal open sockets from your home to the internet, surely it would be much safer to have these devices on a network segment with the least of privileges available, tight egress filtering, encrypted communications, and someone that knows how to configure the firewall rules on the segments gateway.
Lack of Visibility

Check the Lack of Visibility from the VPS chapter, there will be some cross over. If you do not have visibility of what is being communicated in your protocol stack, then the network protocols are open to being exploited. Data Exfiltration leveraging DNS is one example of this. If you are unable to detect potential attacks on the network, before they occur, then the actual network components will be exploited.
Insufficient Logging
Similar to the Logging and Alerting section in the VPS chapter, if you do not have a real-time logging system that sends your events of each network appliance off-site, encrypted, and is able to correlate, aggregate and even graph, you will have a lack of visibility as to what is actually happening on your network.
Lack of Network Intrusion Detection Systems (NIDS)
Intrusion Detection Systems play a big part in detecting and preventing the target from being exploited, they are another crucial component in your defence strategy.
Spoofing
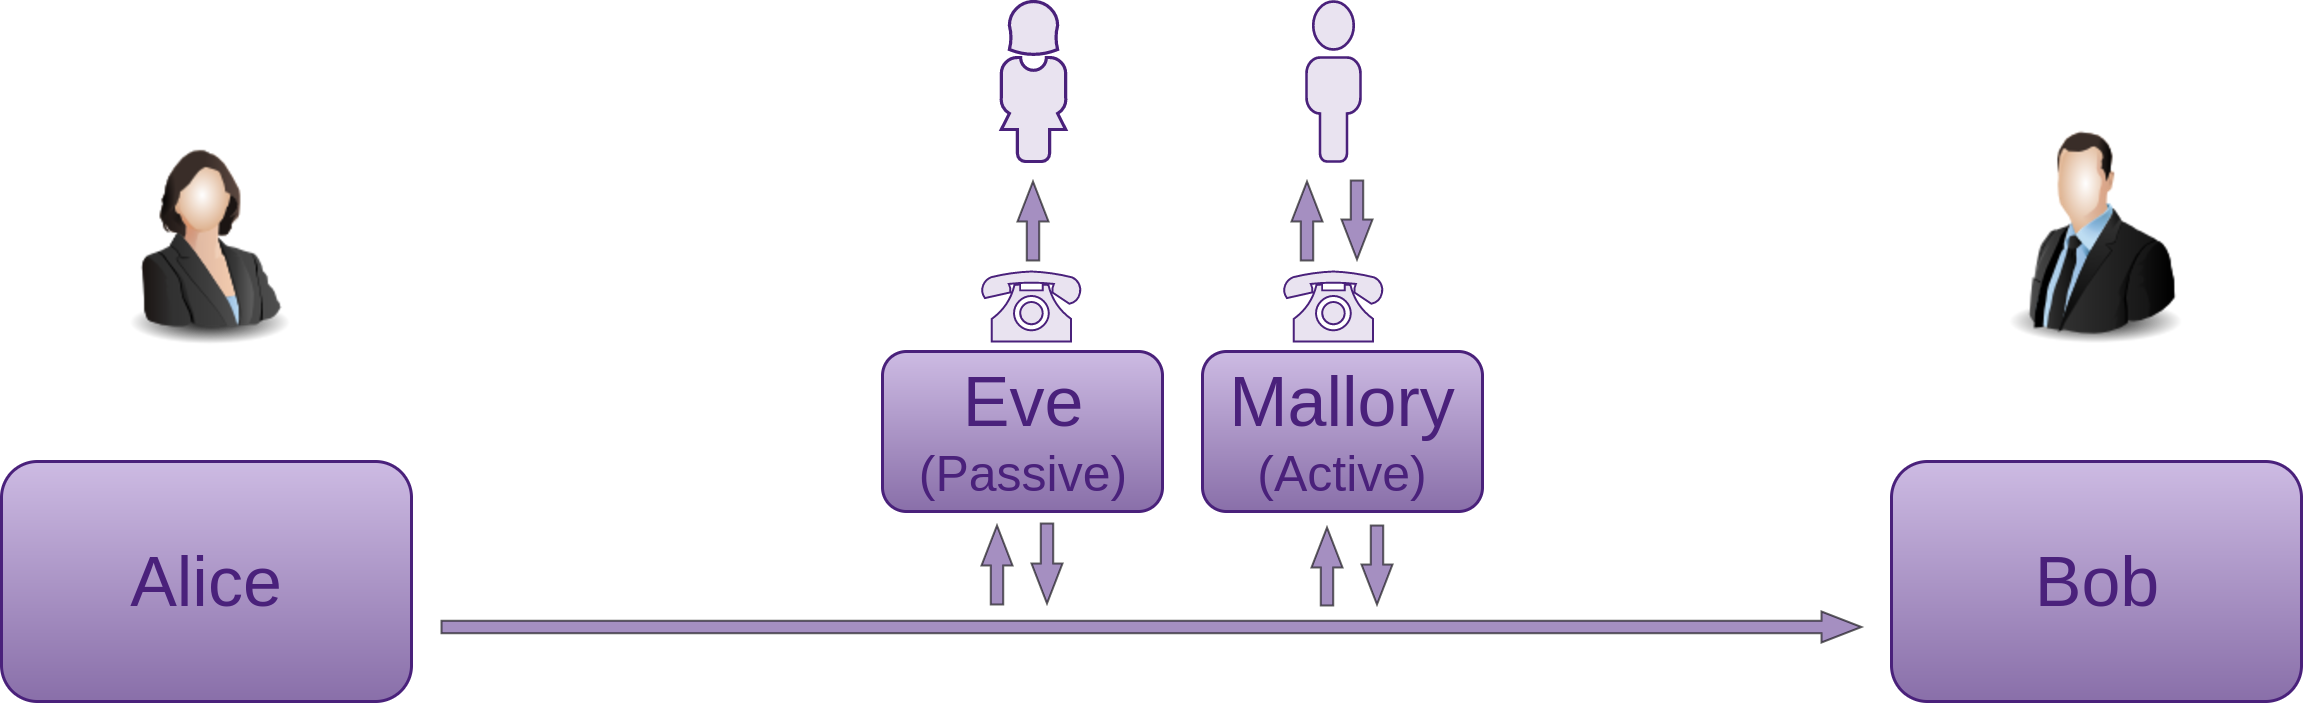
Spoofing on a network is the act of an entity (often malicious (Mallory), but not necessarily) successfully masquerading/impersonating another (Bob) in order to receive information from Alice (sometimes via Eve) that should then reach Bob.
The following are some of the different types of network spoofing.
IP

Setting the IP address in your header to the victims IP address.
Remember we did something similar to this under the “Concealing NMap Source IP Address” of the Reconnaissance section from the Process and Practises chapter in Fascicle 0 with nmap decoy host -D and idle scan -sI.
This is where a sending node will spoof its public IP address (not actually change its IP address) (by forging the header) to look like someone else’s. When the message is received and a reply crafted, the entity creating the reply will look up its ARP table and send the reply to the impersonated entity because the MAC address is still associated with the IP address of the message it received. This sort of play is commonly used in Denial of Service (DoS) attacks, because the attacker does not need or want the response.
In a Distributed DoS (D-DoS) Often the attacker will impersonate the target (often a router or some server it wants to be brought to its knees) and broadcast messages. The nodes that receive these messages consult their ARP tables looking up the spoofed IP address and find the targets associated MAC address and reply to it. This way the replies will be sourced from many nodes. Thus swamping the targets network interface.
Many load testing tools also use this technique to stress a server or application.
ARP (Address Resolution Protocol)
Telling your target that the MAC address it associates with a particular legitimate node (by way of IP address) is now your (the attackers/MItM) MAC address.
Taking the IP spoofing attack further. The MItM sends out ARP replies across the LAN to the target, telling it that the legitimate MAC address that the target associates with the MItM box has now changed to say the routers IP address. This way when the target wants to send a message to say the router, it looks up its ARP table for the routers IP address in order to find its MAC address and now gets the MItM MAC address for the routers IP address, thus the targets ARP cache is said to be poisoned with the MItM MAC address. The target goes ahead and sends its messages to the MItM box which can do what ever it likes with the data. Choose to drop the message or to forward it on to the router in its original or altered state.
This attack only works on a LAN.
The attack is often used as a component of larger attacks, harvesting credentials, cookies, CSRF tokens, hijacking. Even using TLS (in many cases TLS can be downgraded).
There is a complete cloning example of a website, ARP spoof, DNS spoof and hands on hack, in the website section below.
Remember we set-up MItM with ARP spoofing in the VPS chapter to confirm that our logs were in-fact encrypted in transit? Also checkout the MItM With TLS http://frishit.com/tag/ettercap/
DNS

Affects any domain name lookup. That includes email.
This type of attack could allow an intermediary to intercept and read all company emails for example. Completely destroying any competitive advantage. The victim may never know it is happened.
DNS spoofing refers to an end goal rather than a specific type of attack. There are many ways to spoof a name server.
- Compromise the name server itself potentially through its own vulnerabilities (Kaminsky bug for example)
- Poison the cache of the name server
- Poison the cache of an upstream name server and wait for the downstream propagation
- MItM attack. A good example of this is:
- cloning a website you hope your victim will visit
- offering a free Wi-Fi hot-spot attached to your gateway with DNS server provided
Your DNS server provides your cloned website IP address. You may still have to deal with X.509 certificates though, unless the website enforces TLS across the entire site, which is definitely my recommendation. If not, and the potential victim already has the websites certificate they are wanting to visit in their browser, then you will have to hope your victim will click through the warning or work out a TLS downgrade which is going to be harder.
There is a complete cloning example of a website, ARP spoof, DNS spoof and hands on hack, in the website section below
dnschef is a flexible spoofing tool, also available in Kali Linux.
Referrer

This comes under the OWASP Top 10 A7 Missing Function Level Access Control
Often websites will allow access to certain resources so long as the request was referred from a specific page defined by the referer header.
The referrer (spelled referer) field in HTTP requests can be intercepted and modified, so it is not a good idea to use it for authentication or authorisation. The Social Engineering Toolkit (SET) also exploits the referer header, as discussed in the hands on hack within the Spear Phishing section of Identify Risks in the People chapter of Fascicle 0.
EMail Address

The act of creating and sending an email with a forged sender address.
This is useful for spam campaigns sending large numbers of email and for social engineers often sending small numbers of email. The headers can be specified easily on the command line. The tools used essentially modify the headers: From and Reply-To.
The Social Engineer Toolkit (SET) can be handy for sending emails that appear to be from someone the receiver expects to receive email from. Set is capable of doing many tasks associated with social engineering. It even provides the capability to create executable payloads that the receiver may run once opening the email. Payloads in the form of a pdf with embedded exe, which Set allows you to choose form having Set do all the work for you, or you supplying the custom payload and file format.
Most people just assume that an email they have received came from the address it appears to be sent from. The Email headers are very easy to tamper with.
Often other types of spoofing attacks are necessary in order to have the From and Reply-To set to an address that a victim recognises and trusts rather than the attackers address or some other obviously obscure address.
There are also on-line services that allow the sending of email and specifying any from address.
Often the sender of a spoofed email will use a from address that you recognise in hope that you will click on a link within the email thus satisfying their phish.
Website

An attacker can clone a legitimate website (with the likes of the Social Engineering Kit (SET)) or the Browser Exploitation Framework (BeEF) and through social engineering, phishing, email spoofing or any other number of tricks (as discussed in the People chapter of Fascicle 0), coerce a victim to browse the spoofed website. In fact, if you clone a website that you know your victim visits regularly, then you can just do that and sit and wait for them to take the bait. Better still automote your attack so that when they do take the bait exploits are fired at them automatically. Once the victim is on the spoofed website, the attacker can harvest credentials or carry out many other types of attacks against the non-suspecting user.
The victim may visit the attackers cloned website due to ARP and/or DNS spoofing. Subterfuge is handy to run a plethora of attacks against the victims browser through the likes of the Metasploit Browser AutoPwn module. If >0 attacks are successful (we have managed to install a root-kit), the attacker will usually get a remote command shell to the victims system by way of reverse or bind shell. Then simply forward them onto the legitimate website without them even being aware of the attack.

The following attack was one of five that I demonstrated at WDCNZ in 2015. The two leading up to this one provide some context and it is probably best to look at them first if you have not already.
You can find the video of how it is played out at http://youtu.be/ymnqTrnF85M.
The following attack was the fourth of five that I demonstrated at WDCNZ in 2015. The previous demo will provide some additional context and it is probably best to look at it first if you have not already.
You can find the video of how it is played out at http://youtu.be/WSwqNb_94No.
Data Exfiltration, Infiltration

Ingress and Egress Techniques
In many/most cases a target will have direct access, or almost direct via a proxy from their corporate LAN to the internet. This makes egress of any kind trivial. The following are some commonly used techniques:
Dropbox
No anti-virus is run by Dropbox on the files that Dropbox syncs. This means that Dropbox is a risk in a corporate environment, or any work environment where workers can access their files from multiple networks. Dropbox via an account or even just their HTTP links can be a useful means for exfiltration of data. Dropbox APIs and their SDKs along with community provided SDKs can assist the attacker greatly in exfiltrating their targets data over HTTP(S), and establishing command and control (C2) communications. DropboxC2C is one project that does this. All bar the most secure environments allow HTTP(S) egress.
Physical
If there is no Internet access from the targets environment, physical media can be utilised. We discussed this in the Infectious Media subsection of Identify Risks of the People chapter of Fascicle 0.
Mobile Phone Data
In most cases, everyone carries at least one mobile phone capable of connecting to the Internet via their cellular provider, obviously this bypasses any rules that the target organisation has in place. Data can be easily exfiltrated directly from mobile devices, or via their access point feature if enabled. Bluetooth offers a similar functionality.
An attacker has options such as using staff members phones, or if they can get a phone to within wireless access coverage of a computer with a wireless interface that has data to be exfiltrated, then they just need to make the access point switch. This could be done during a lunch break.
DNS, SSH
In the case of very security conscious environments, where few users have any access to the Internet, and those that do have, the access is indirect via a very restrictive proxy.
If a user has any Internet access from a machine on the internal network, then you can probably leverage DNS.
If a ping command is sent from the internal machine, this may produce a timed out result, but before the ping can be resolved, a DNS query must be satisfied.
(172.217.25.163) 56(84) bytes of data.
# Here, the command will print:
Request timed out.
Request timed out.
Request timed out.
etc.
# Or just hang and then print something similar to:
--- google.co.nz ping statistics ---
662 packets transmitted, 0 received, 100% packet loss, time 662342ms
So although the ICMP protocol requests may be blocked or dropped, the DNS query will likely be forwarded from the local system resolver / DNS client / stub resolver to the organisations Internet facing name server, then forwarded to an ISPs or alternative name servers on the Internet. This same DNS lookup will occur when many other protocols that may be blocked are initiated.
dig +trace mirrors the way a typical DNS resolution works, but provides visibility into the actual process and steps taken.
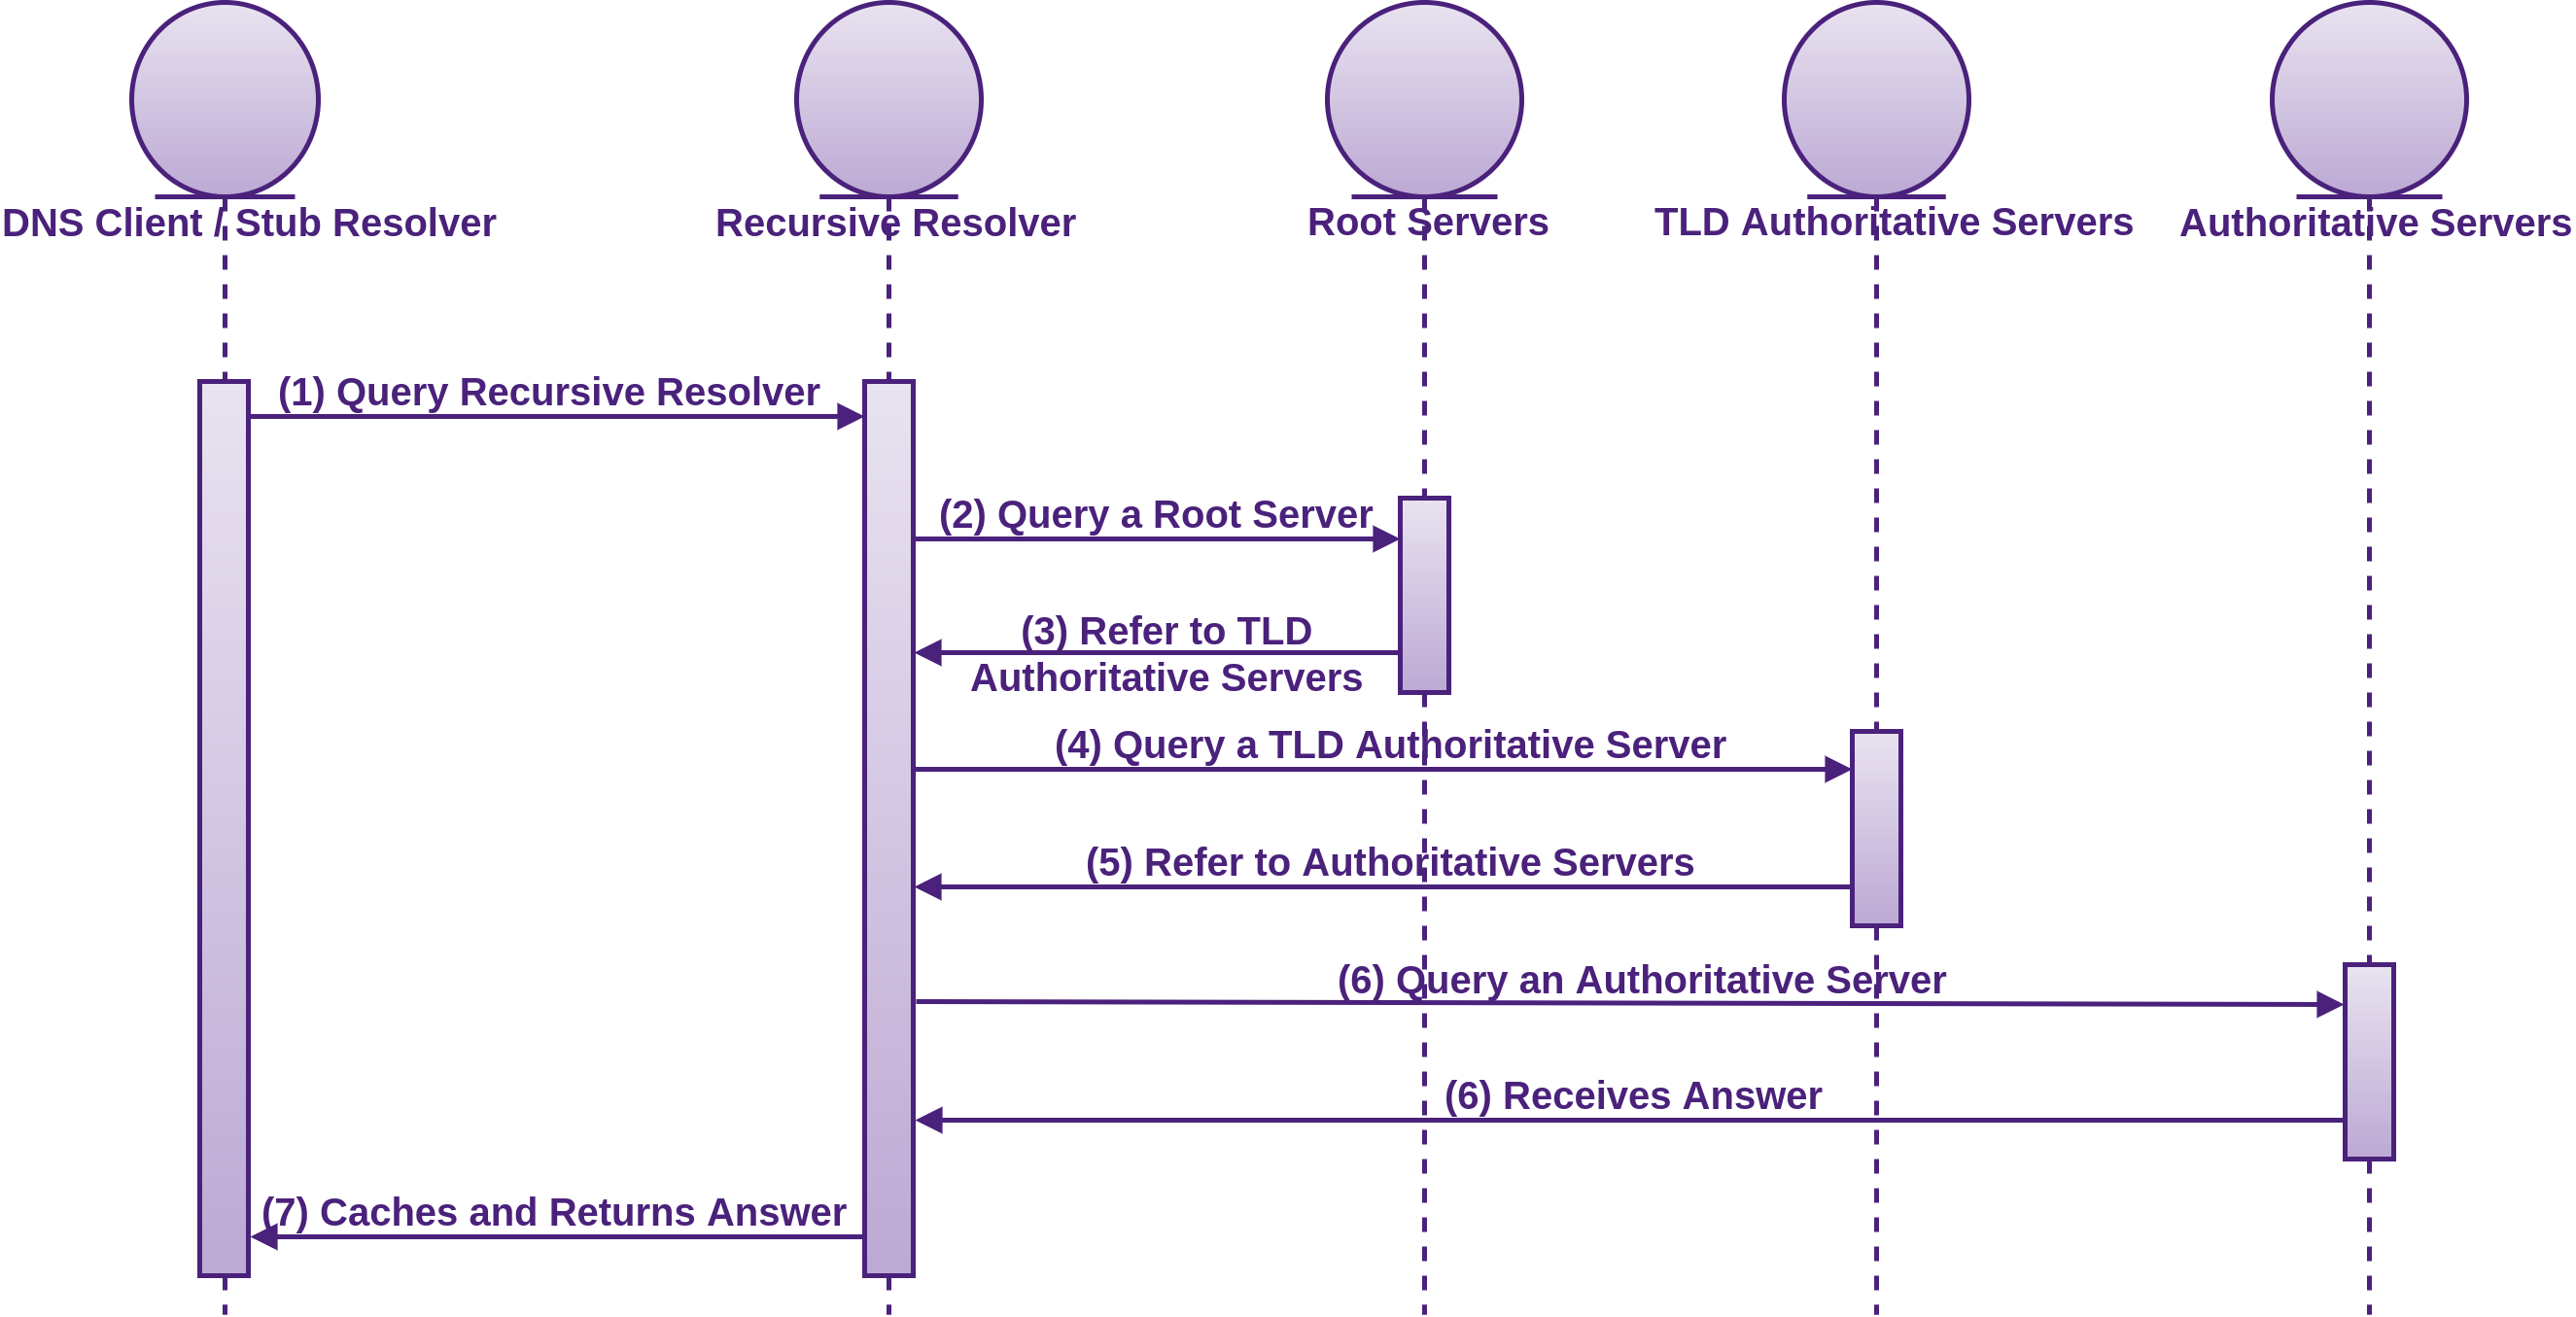
By using dig +trace we can get feedback on how the given fully qualified domain name (FQDM) is resolved. dig +trace works by pretending it is a name server, iteratively querying recursive and authoritative name servers. The steps taken in a DNS query which is mirrored by dig +trace look like the following:
- DNS query is sent from a client application to the system resolver / DNS client / stub resolver. The stub resolver is not capable of a lot more than searching a few static files locally such as
/etc/hosts, maintaining a cache, and forwarding requests to a recursive resolver, which is usually provided by your ISP or one of the other DNS providers you may choose, such as Level 3, Google, DynDNS, etc. The stub resolver can not follow referrals. If the stub resolvers cache or hosts file does not contain the IP address of the queried FQDM that is within the time-to-live (TTL) if cached, the stub resolver will query the recursive resolver. The query that the stub resolver sends to the recursive DNS resolver has a special flag called “Recursion Desired” (RD) in the DNS request header (see RFC 1035 for details) which instructs the resolver to complete the recursion and provide a response of either an IP address (with the “Recursion Available” (RA) flag set), or an error (with the “Recursion Available” (RA) flag not set) - The recursive resolver will check to see if it has a cached DNS record from the authoritative nameserver with a valid TTL. If the recursive server does not have the DNS record cached, it begins the recursive process of going through the authoritative DNS hierarchy. The recursive resolver queries one of the root name servers (denoted by the ‘.’ at the end of the domain name) for the requested DNS record to find out who is the authoritative name server for the TLD (
.nzin our case). This query does not have theRDflag set, which means it is an “iterative query”, meaning that the response must be one of either:- The location of an authoritative name server
- An IP address as seen in step 6 once the recursion resolves
- An error
There are 13 root server clusters from a-m, as you can see in the
dig +traceoutput below, with servers from over 380 locations - The root servers know the locations of all of the Top-Level Domains (TLDs) such as
.nz,.io,.blog,.com, but they do not have the IP information for the FQDN, such asgoogle.co.nz. The root server does know that the TLD.nzmay know, so it returns a list of all the four to thirteen clustered.nzgeneric TLD (gTLD) serverns(name server) IP addresses. This is the root name servers way of telling the recursive resolver to query one of the.nzgTLD authoritative servers - The recursive resolver queries one of the
.nzgTLD authoritative servers (ns<n>.dns.net.nz.in our case) forgoogle.co.nz. - The
.nzTLD authoritative server refers the recursive server to the authoritative servers forgoogle.co.nz.(ns<n>.google.com.) - The recursive resolver queries the authoritative servers for
google.co.nz,and receives 172.217.25.163 as the answer - At this point the recursive resolver has finished its recursive process, caches the answer for the TTL duration specified on the DNS record, and returns it to the stub resolver having the “Recursion Available” (RA) flag set, indicating that the answer was indeed fully resolved
; <<>> DiG 9.10.3-P4-Ubuntu <<>> +trace google.co.nz
;; global options: +cmd
.        448244   IN NS b.root-servers.net.
.        448244   IN NS h.root-servers.net.
.        448244   IN NS l.root-servers.net.
.        448244   IN NS a.root-servers.net.
.        448244   IN NS j.root-servers.net.
.        448244   IN NS c.root-servers.net.
.        448244   IN NS m.root-servers.net.
.        448244   IN NS e.root-servers.net.
.        448244   IN NS g.root-servers.net.
.        448244   IN NS i.root-servers.net.
.        448244   IN NS d.root-servers.net.
.        448244   IN NS k.root-servers.net.
.        448244   IN NS f.root-servers.net.
# The RRSIG holds the DNSSEC signature.
# +trace includes +dnssec which emulates the default queries from a nameserver
.        514009   IN RRSIG NS 8 0 518400 20170728170000 20170715160000 15768 . Egf30NpCVAwTA4\
q8B8Ye7lOcFraVLo3Vh8vlhlZFGIFHsHNUFDyK2NxM RJr4Z+NzZat/JUmNQscob5Mg9N2ujVPZ9ZgQ1TJ8Uu6+azR6A1\
kr95Vu S8hepkdr42lZdrv2QV9qR0DeXWglo0NemF7D7ZMlM/fVAoiYvoDRugc6 v9SWjedD3XtOoOjPAYjNc7M8PQ6VZ\
5qIil2arnR/ltQJm2bQbIXAw4DG a3NQJw06G5E7FjMqn+/tTfzm/Z95UIsAUojGV4l1VIGulm9IZtYB5H5C hCoWt4bh\
aCKm2U2BJBfmvvB7rN1fsd1JKnCayzKvHRL0WWvSsvjyN6Hv F/PCaw==
;; Received 1097 bytes from 127.0.1.1#53(127.0.1.1) in 91 ms
172800 IN NS ns1.dns.net.nz.
nz. 172800 IN NS ns2.dns.net.nz.
nz. 172800 IN NS ns3.dns.net.nz.
nz. 172800 IN NS ns4.dns.net.nz.
nz. 172800 IN NS ns5.dns.net.nz.
nz. 172800 IN NS ns6.dns.net.nz.
nz. 172800 IN NS ns7.dns.net.nz.
nz. 86400 IN DS 46034 8 1 316AB5861714BD58905C68B988B2B7C87CB78C4A
nz. 86400 IN DS 46034 8 2 02C64093D011629EF821494C5D918B8151B1B81FD008E175954F8871 19\
FEB5B1
nz. 86400 IN RRSIG DS 8 1 86400 20170728170000 20170715160000 15768 . RAn3+mAjCAk5+/H\
3J4YMjISnitGJHMaR49n+YPn2q447VXViBcUxm0hO ZK+3ut5ywtiT4v1AMZXN9TDQ1EFe2T/VPWbdpOEs71pOS9/wdAZ\
OlySR 9tfdwdnnPb1+InA9H1u384vCZDIoy4vsz9jRnBk3+hIocIcrmMhMdSJU jNBXfaW3uZ5vboQqAzr1WhrbyHebRF\
Mdiq+NliSQU/DunOOD2j/9fJu/ VT4dWFP3mkb3wYPm+MLwDO7hDatJih5dmKzREzjVbxiGjaFQyTUTz7CZ EJsP8O21e\
8TZLk5mWenBrWhkcce+xas8PGXh754Ltg3/1zuUmuuJ93Sf PwCBwQ==
;; Received 854 bytes from 192.58.128.30#53(j.root-servers.net) in 649 ms
86400 IN NS ns3.google.com.
google.co.nz. 86400 IN NS ns1.google.com.
google.co.nz. 86400 IN NS ns2.google.com.
google.co.nz. 86400 IN NS ns4.google.com.
e1e8sage14qa404t0i37cbi1vb5jlkpq.co.nz. 3600 IN NSEC3 1 1 5 5AFBAC60E6291D43 E3D0PASFAJFBN\
713OGDH06QD9PUOUFOL NS SOA RRSIG DNSKEY NSEC3PARAM
e1e8sage14qa404t0i37cbi1vb5jlkpq.co.nz. 3600 IN RRSIG NSEC3 8 3 3600 20170724002713 201707\
15224319 17815 co.nz. PSQpSuLombCp+gzGad6vfjQwQXdtEho1asIu7LR8ROpISAiVYuNaDCzn syxVWPDt5JXuV4\
Ro9QwqtIIyKGp+SR0E6vfB0ZBmKMWTGE8JDs4wFJD8 4Pa3EJE9HD6D5OzYLGWp74j5rKCmhX1tHsAZH6kxMepxmXe7Yx\
r1ejSU pNA=
o5jradpam3chashu782ej6r90spf0slk.co.nz. 3600 IN NSEC3 1 1 5 5AFBAC60E6291D43 OBU0IO78N1LTE\
RC33TPID5EMGNQOA7T7 NS DS RRSIG
o5jradpam3chashu782ej6r90spf0slk.co.nz. 3600 IN RRSIG NSEC3 8 3 3600 20170721184152 201707\
14214319 17815 co.nz. F7I2sw56hULCCYpZuO9i5020cXoq+31tTaoU9c/uNr6amFdO112oximh mDr3Ad/w/E7Le4\
WVmGAHOgeLsFH8OI19MciVqMmg232z04jVLdIuFIBH U+SsRXiwzoRb5fFh/mlUthjiqjk+0U/LPbM3jZNqRduSbDRFaE\
JOsGz4 ZlQ=
;; Received 628 bytes from 185.159.197.130#53(ns5.dns.net.nz) in 319 ms
300 IN A 172.217.25.163
;; Received 46 bytes from 216.239.32.10#53(ns1.google.com) in 307 ms
In following the above process through, you can see that although egress may be very restricted, DNS will just about always make it to the authoritative name server(s).
The most flexible and useful type of DNS record for the attacker is the TXT record. We discuss the DNS TXT record briefly in the EMail Address Spoofing Countermeasures subsection. The TXT record is very flexible, useful for transferring arbitrary data, including code, commands (see section 3.3.14. TXT RDATA format of the specification), which can also be modified at any point along its travels. There is no specific limit on the number of text strings in a TXT RDATA field, but the TXT-DATA can not exceed 65535 bytes (general restriction on all records) in total. Each text string can not exceed 255 characters in length including the length byte octet of each. This provides plenty of flexibility for the attacker.
The evolution of data exfiltration and infiltration started with OzymanDNS from Dan Kaminsky in 2004. Shortly after that Tadeusz Pietraszek created DNScat, providing bi-directional communications through DNS servers. DNScat took the netcat idea and applied it to DNS, allowing penetration testers and attackers alike to pass through firewalls unhindered. DNScat is written in Java, requiring the JVM to be installed. Ron Bowes created the successor called dnscat2, you can check the history of dnscat2 on the github history section.
In order to carry out a successful Exfil, the attacker will need:
- A domain name registered for this attack
- A payload they can drop on one to many hosts inside their target network. The dnscat2 client is written in C, modifications can and should be made to the source to help avoid detection. Dnscat2 also provides the ability to tunnel SSH from the dnscat2 server (C2) to the dnscat2 client, and even to other machines on the same network. All details are provided on the dnscat2 github, and even more details are provided on Ron’s blog. Once the attacker has modified the client source, they will most likely run VirusTotal or a similar service over it, to attempt to verify the likelihood of the payload being detected. We have covered quite a few techniques for increasing the chances of getting the payload onto the target systems in the PowerShell subsections of the VPS chapter, and the Infectious Media subsections of the People chapter in Fascicle 0.
- A command and control (C2) server set-up as the domains authoritative name server that is capable of communicating with the executing payload(s) on the hosts inside the targets network. izhan created a howto document covering the authoritative name server set-up. dnscat2 was created for this very reason.
All the documentation required to set-up the C2 server and client is provided by dnscat2.
Doppelganger Domains
Often domain consumers (people: sending emails, browsing websites, SSHing, etc) miss type the domain. The most common errors are leaving ‘.’ out between the domain and sub domain. Even using incorrect country suffixes. Attackers can take advantage of this by purchasing the miss typed domains. This allows them to intercept requests with: credentials, email and other sensitive information that comes their way by unsuspecting domain consumers.
Web-sites
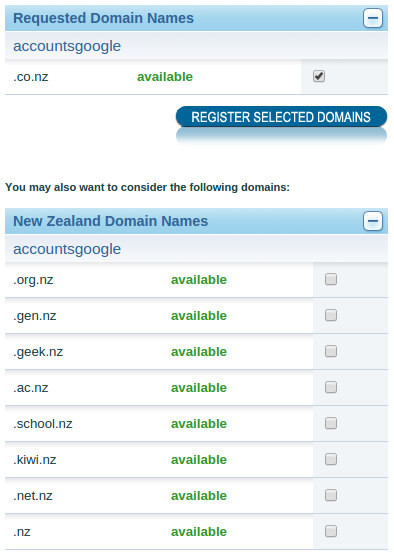
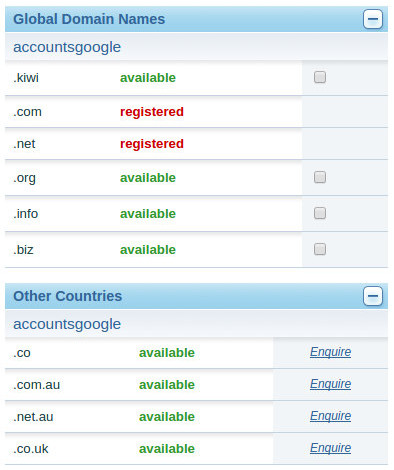
Useful for social engineering users to a spoofed web-site. The attacker may not be able to spoof the DNS entries, although this is the next best thing. For example accountsgoogle.co.nz could look reasonably legitimate for a New Zealand user intending to sign into their legitimate google account at accounts.google.com. In fact at the time of writing, this domain is available. Using the methods described in the Website section to clone and host a site and convince someone to browse to it with a doppelganger domain like this is reasonably easy.
SMTP
- By purchasing the doppelganger (miss typed) domains
- configuring the mail exchanger (MX) record
- setting up an SMTP server to catch all
- record
- modify the to address to the legitimate address
- modify the from address to the doppelganger domain that the attacker owns (thus also intercepting the mail replies)
- forward (essentially MItM).
The attacker gleans a lot of potentially sensitive information.
SSH
Less traffic, but if/when compromised, potentially much larger gains. You do not get better than shell access. Especially if they have not disallowed root, as discussed in the VPS chapter under Hardening SSH.
Setup the DNS A record value to be the IP address of the attackers SSH server and the left most part of the name to be “*”, so that all possible substitutions that do not exist (not just that do not have any matching records) will receive the attackers SSH server IP address. The DNS wild-card rules are complicated.
An SSH server needs to be set-up to record the user-names and passwords. The OpenSSH code needs to be modified in order to do this.
Wrongfully Trusting the Loading of Untrusted Web Resources

By default, the browser allows all resources from all locations to be loaded. What would happen if one of those servers was compromised or an attacker was tampering with the payload potentially changing what was expected for something malicious to be executed once loaded? This is a very common technique for attackers wishing to get their malicious scripts into your browser.
TLS Downgrade

When ever a user browses to a HTTPS website, there is the potential for an attacker to intercept the request before the TLS handshake is made, and if the web server accepts an unencrypted request, redirect the user to the same website but without the TLS.
This is a danger for all websites that do not enforce TLS for every page, or better, at the domain level. For example many websites are run over plain HTTP until the user wants to log-in. At which point the browser issues a request to an HTTPS resource that is listed on an unencrypted page. These requests can easily be intercepted and the attacker change the request to HTTP so that the TLS handshake is never made.
https://httpswatch.nz is an excellent resource for some of the prominent websites in New Zealand, informing them of the issues in regards to HTTPS health.
3. SSM Countermeasures
Revisit the Countermeasures subsection of the first chapter of Fascicle 0.
Fortress Mentality

This section takes the concepts from the section with the same name from the Physical chapter in Fascicle 0.
Once we get over the fact that we are no longer safe behind our firewalls, we can start to progress in terms of the realisation that our inner components: services, clients, communications will be attacked, and we need to harden them.
Our largest shortcoming continues to be our people falling victim to common social engineering attacks. I’ve spoken about this in Fascicle 0, so please refer to that if you have not already read it.
The organisation needs to decide and enforce their own policies, just as you do for your own personal devices and network(s).
The organisation could decide to not allow any work devices to be taken from the premises.
Another option is to actually help their workers be more secure with everything in their lives that have the potential to impact the business. What effects the workers impacts the business.
Have a separate wireless network for your visitors and workers to access the internet.
In terms of technology, most of the VPS chapter was focussed on removing services that are not needed and hardening those that are, with the intention that your corporate network is almost as good as being directly on the internet without a perimeter anyway.
Once you have made sure your listening services are patched and you are only using security conscious services, your communications between services are encrypted, then technology wise, you are doing well.
For file and data sharing from machine to machine no matter where they are, and also from software client to service you can use the likes of Tresorits offerings:
- Tresorit for encrypted file storage for as many people as need it, with about as much configurability as you can dream of
- Tresorit ZeroKit SDK User authentication and end-to-end encryption for Android, iOS and JavaScript applications
Lack of Segmentation
By creating network segments containing only the resources specific to the consumers that you authorise access to, you are creating an environment of least privilege, where only those authorised to access resources can access them.
For example, if you felt it was essential for your kitchen appliances to be able to talk to the internet, then put them all on a separate network segment, and tightly constrain their privileges.
By segmenting a network, it creates a point of indirection that the attacker has to attempt to navigate passage through. Depending on how the gateway is configured, depends how difficult and time consuming it is to traverse.
Network segmentation has the potential to limit damage to the specific segment affected.
PCI-DSS provides guidance on why and how to reduce your compliance scope, much of this comes down to segmenting all card holder data from the rest of the network.
I spoke a little about host firewalls in the VPS chapter. In regards to network firewalls, they play an important role in allowing (white listing) only certain hosts, network segments, ports, protocols, etc into any given gateways network interface.
Logging, alerting, IDS/IPS play an important part in monitoring, providing visibility and even preventing some network attacks. They were discussed in the context of hosts in the VPS chapter and similarly apply to networking, we will address these in the next section.
Component Placement
Some examples of how and where you could/should place components:
Servers that need to serve the World Wide Web, should be on a demilitarisation zone (DMZ). Your organisations corporate LAN should only have network access to the DMZ in order to perform administrative activities at the most, SSH and possibly port 443. It is also a good idea to define which host IP addresses should be allowed traversal from the LAN gateway interface. In some cases even network access is locked down and physical access is the only way to access DMZ resources. The DMZ gateway interface should have rules to only allow what is necessary to another network segment as discussed briefly in the VPS chapter, for example:
- To data-stores if necessary
- For system updates
- DNS if necessary. Also review the sections on DNS spoofing and Data Exfiltration leveraging DNS later in this chapter
- To a syslog server, as discussed later in this chapter and also in the VPS chapter
- Access to time server (NTP)
Consider putting resources like data-stores in a secluded segment. VLAN or physical, but isolate them as much as possible.
Also consider using Docker containers which provide some free isolation.
Lack of Visibility
There are quite a few things that can be done to improve visibility on your networks. Let us address logging and Network Intrusion Detection Systems.
Insufficient Logging
If you think back to the Web Server Log Management countermeasures section in the VPS chapter, we outlined an Environmental Considerations section, in which I deferred to this section, as it made more sense to discuss alternative device system logging such as routers, layer 3 switches, in some cases layer 2 switches, data-store, and file servers here in the Network chapter rather than under VPS. Let us address that now.
Steps in order of dependencies

None of these are ideal, as UDP provides no reliable messaging and it is crucial that “no” system log messages are lost, which we can not guarantee with UDP. Also with some network components, we may not be able to provide confidentiality or integrity of messages over the wire from network appliances that only support UDP without TLS (DTLS), a VPN, or any type of encryption. This means we can no longer relly on our logs to provide the truth. The best case below still falls short in terms of reliability, as the test setup used pfSense which only supports sending syslogs via UDP. The best you could hope for in this case is that there is not much internal network congestion, or find a router that supports TCP at a minimum.
Steps with details
Here we discuss three steps. Each step has a selection of options. You could choose one option from each of the three steps.
- As per the PaperTrail set-up we performed in our test lab
-
- Create persistence of FreeNAS syslogs, as currently they are lost on shutdown because FreeNAS runs entirely in RAM
- Create a dataset called “syslog” on your ZFS zpool and reset.
- (Option first choice, for pfSense)
- Create a jail in FreeNAS, install OpenVPN in the jail, install rsyslogd in the jail and configure it to accept syslog events via UDP as TCP is not supported, from the host and the remote hosts, and forward them on via TCP(possibly with RELP)/TLS to the external syslog aggregator.
- (Option second choice) Receive syslogs from local FreeNAS and other internal appliances that only send using UDP (pfSense in our example lab, and possibly layer 3 (even 2) switches and APs) and possibly some appliances that can send via TCP.
- Download and run SyslogAppliance which is a turn-key VM for any VMware environment. SyslogAppliance is a purpose built slim Debian instance with no sshd installed, that can receive syslog messages from many types of appliances, including routers, firewalls, switches, and even Windows event logs via UDP and TCP. SyslogAppliance also supports TLS and comes preconfigured with rsyslog and LogAnalyzer, thus providing log analysis and alerting. This means step 3 is no longer required, as it is being performed by LogAnalyzer. This option could also store its logs on an iSCSI target from FreeNAS.
- (Option third choice) Receive syslogs from local FreeNAS and other internal appliances that only send using UDP (pfSense in our example lab, and possibly layer 3 (even 2) switches and APs).
- The default syslogd in FreeBSD doesn’t support TCP.
- Create a jail in FreeNAS, install rsyslogd in the jail and configure it to accept UDP syslog messages and then forward them on via TCP(possibly with RELP)/TLS.
- Create persistence of FreeNAS syslogs, as currently they are lost on shutdown because FreeNAS runs entirely in RAM
-
- (Option first choice for pfSense) UDP, as TCP is not available.
- In the pfSense Web UI: Set-up a vpn from site ‘a’ (syslog sending IP address) to site ‘b’ (syslog receiving IP address / remote log destination).
- Then in Status -> System Logs -> Settings -> Remote Logging Options, add the
IP:portof the listening VPN server, which is hosted in the FreeBSD jail of the rsyslogd server (FreeNAS in this example) into one of the “Remote log servers” input boxes. The other option here is to send to option second choice of step two (SyslogAppliance). - Your routing table will take care of the rest.
- (Option second choice)
- Configure syslog UDP only appliances to forward their logs to the rsyslogd in the jail (option third choice of step two), or to option second choice of step two (SyslogAppliance).
- (Option first choice for pfSense) UDP, as TCP is not available.
There are also a collection of Additional Resources worth looking at.
Network Time Protocol (NTP)
As we discussed in the VPS chapter under the Logging and Alerting section, being able to coalate the times of events of an attackers movements throughout your network is essential in auditing and recreating what actually happened.
Your NTP Server
With this set-up, we have got one-to-many Linux servers in a network that all want to be synced with the same up-stream Network Time Protocol (NTP) server(s) that your router (or what ever server you choose to be your NTP authority) uses.
On your router or what ever your NTP server host is, add the NTP server pools. Now how you do this really depends on what you are using for your NTP server, so I will leave this part out of scope. There are many NTP pools you can choose from. Pick one or a collection that is as close to your NTP server as possible.
If your NTP daemon is running on your router, you will need to decide and select which router interfaces you want the NTP daemon supplying time to. You almost certainly will not want it on the WAN interface (unless you are a pool member, or the WAN belongs to you) if you have one on your router.
Make sure you restart your NTP daemon.
Your Client Machines
There are two NTP packages to disgus.
-
ntpdate is a programme that sets the date on a scheduled occurance via chron, an end user running it manually, or some other means. Ntpdate has been deprecated for several years now. The functionality that ntpdate offered is now provided by the ntp daemon. running
ntp -qwill run ntp, set the time and exit as soon as it has. This functionality mimics how ntpdate is used, the upstream NTP server must be specified either in the/etc/ntp.conffile or overridden by placing it immeiatly after the-qoption if running manually. -
ntpd or just ntp, is a daemon that continuously monitors and updates the system time with an upstream NTP server specified in the local systems
/etc/ntp.conf
Setting up NTP
- This is how it used to be done with ntpdate:
If you have ntpdate installed,
/etc/default/ntpdatespecifies that the list of NTP servers is taken from/etc/ntp.confwhich does not exist without ntp being installed. It looks like this:/etc/default/ntpdate # Set to "yes" to take the server list from /etc/ntp.conf, from package ntp,# so you only have to keep it in one place.NTPDATE_USE_NTP_CONF=yesYou would see that it also has a default
NTPSERVERSvariable set which is overridden if you add your time server to/etc/ntp.conf. If you entered the following and ntpdate is installed:dpkg-query -W -f='${Status} ${Version}\n'ntpdateYou would receive output like:
install ok installed1:4.2.6.p5+dfsg-3 - This is how it is done now with ntp:
If you enter the following and ntp is installed:
dpkg-query -W -f='${Status} ${Version}\n'ntpYou will receive output like:
install ok installed1:4.2.8p4+dfsg-3Alternatively run this command for more information on the installed state:
dpkg-query -l'*ntp*'# Will also tell you about ntpdate if it is installed.If ntp is not installed, install it with:
sudo apt-get install ntpYou will find that there is no
/etc/default/ntpdatefile installed with ntp.The public NTP server(s) can be added straight to the bottom of the
/etc/ntp.conffile, but because we want to use our own NTP server, we add the IP address of our server that is configured with our NTP pools to the bottom of the file./etc/ntp.conf server <IP address of your local NTP server here>Now if your NTP daemon is running on your router, hopefully you have everything blocked on its interface(s) by default and are using a white-list for egress filtering. In which case you will need to add a firewall rule to each interface of the router that you want NTP served up on. NTP talks over UDP and listens on port 123 by default. After any configuration changes to your
ntpdmake sure you restart it. On most routers this is done via the web UI.On the client (Linux) machines:
sudo service ntp restartNow issuing the date command on your Linux machine will provide the current time with seconds.
Trouble-shooting
The main two commands I use are:
Which should produce output like:
jitter
============================================================================================
*<server name>.<domain name> <upstream ntp ip address> 2 u 54 64 77 0.189 16.714 11.589
and the standard NTP query program followed by the as argument:
Which will drop you at the ntpq prompt:
Which should produce output like:
cnt
===========================================================
1 15720 963a yes yes none sys.peer sys_peer 3
In the first output, the * in front of the remote means the server is getting its time successfully from the upstream NTP server(s) which needs to be the case in our scenario. Often you may also get a refid of .INIT. which is one of the “Kiss-o’-Death Codes” which means “The association has not yet synchronized for the first time”. See the NTP parameters. I have found that sometimes you just need to be patient here.
In the second output, if you get a condition of reject, it is usually because your local ntp can not access the NTP server you set-up. Check your firewall rules etc.
Now check all the times are in sync with the date command.
Lack of Network Intrusion Detection Systems (NIDS)
Similar to HIDS but acting as a network spy with its network interface (NIC) in promiscuous mode, capturing all traffic crossing the specific network segment that the NIDS is on, ideally before (preventative) it reaches its target. NIDS are usually positioned strategically between a potential attack source and target.
NIDS can be installed into many existing network devices, such as routers, network firewalls, switches, or come out of the box as stand-alone hardware, not consuming any existing hosts resources. HIDS are in most cases reactive, as in the attack has to have already occurred in order to be detected. Where as NIDS/NIPS can analyse the network packets before they reach their target, ideally mitigating the attack. All security is a combination of detection, prevention and response. We need to realise that any single one of these is not enough, but all three are required to achieve defence in depth.
NIDS can operate with Signatures:
- String signatures look like known attack strings or sub-strings. “For example, such a string signature in UNIX can be “cat “+ +” > /.rhosts” , which if executed, can cause the system to become extremely vulnerable to network attack.”
- Port: “Port signatures commonly probes for the connection setup attempts to well known, and frequently attacked ports. Obvious examples include telnet (TCP port 23), FTP (TCP port 21/20), SUNRPC (TCP/UDP port 111), and IMAP (TCP port 143). If these ports aren’t being used by the site at a point in time, then the incoming packets directed to these ports are considered suspicious.”
- Header condition: “Header signatures are designed to watch for dangerous or illegitimate combinations in packet headers fields. The most famous example is Winnuke, in which a packet’s port field is NetBIOS port and one of the Urgent pointer, or Out Of Band pointer is set. In earlier version of Windows, this resulted in the “blue screen of death”. Another well known such header signature is a TCP packet header in which both the SYN and FIN flags are set. This signifies that the requestor is attempting to start and stop a connection simultaneously.”
Quotes from the excellent Survey of Current Network Intrusion Detection Techniques
NIDS can operate with Anomalies:
With anomaly detection, a known good state must be established and recorded before the system is able to detect changes to that good state. Similarly to file integrity checkers such as Stealth, the system needs to know what a good state looks like before that good state can be protected. This initial recording of the good state can take time and requires normal operating network traffic without any malicious activity, similar to how we discussed the preparation for DMZ in the VPS chapter.
Signature-based pros:
- Off the shelf patterns can be used to match against
- No learning period for the NIDS required
- Faster to match patterns
- Less false positives
- Easier to set-up/configure
Signature-based cons:
- Fails when it comes to zero-day attacks, until the signatures have been provided by analysts
- Often do not stand up well to sophisticated new attacks
Anomaly-based pros:
- The system can continue to learn and be taught what new attacks look like. Thus the system can grow with your needs
- Does not need existing patterns as signature-based does
- Can react immediately to zero-day attacks because they do not fit the normal known good state
- Stand a much better chance at standing up to sophisticated new attacks
- Effective at establishing good known state for each protocol stack
Anomaly-based cons:
- A learning period is required for the NIDS to establish a good known state of normal non-malicious traffic
- More false positives
- Can be harder to set-up/configure
Ideally you will set-up NIDS that uses both signature and anomaly based detection.
It is a good idea to have both Host and Network IDS/IPS in place at a minimum. I personally like to have more than one tool doing the same job but with different areas of strength covering the weaker areas of its sibling. An example of this is with HIDS. Having one HIDS on the system it is protecting and another somewhere else on the network, or even on another network completely, looking into the host and performing its checks. This makes discoverability difficult for an attacker.
Some excellent free and open Enterprise grade NIDS
- Snort is the leader in free and open source NIDS, mature with a strong community, Snort can be seen used in many different scenarios. Written in C, and version 3 which is supposed to be multi-threaded is still in its third alpha. Covering both signature and anomaly-based techniques. I’ve personally used Snort and found it a joy to work with
- Bro uses its own domain specific language (DSL), uses anomaly-based detection techniques and is often used in conjunction with Snort, they complement each other well. Bro has many protocol analysers and is also often used for forensic analysis
- Suricata is a direct competitor with Snort, is written in C, multi-threaded and supposed to be faster, but possibly only noticed once throughput of 1 Gbps speeds are well exceeded. SANS produced an Open Source IDS Performance Shootout document worth reading if performance is an issue for you. Suricata can be thought of as the next generation Snort
- Security Onion is an Ubuntu based distribution containing intrusion detection, network security monitoring, and log management tools, such as: OSSEC, Snort, Suricata, Bro, netsniff-ng, Sguil, ELSA, Xplico, NetworkMiner, and many others. This allows you to set-up a free and open source enterprise grade network security appliance
Spoofing
The following are a collection of mitigations for the types of network spoofing discussed.
IP

Filter incoming packets (ingress) that appear to come from an internal IP address at your perimeter.
Filter outgoing packets (egress) that appear to originate from an invalid local IP address.
Not relying on IP source address’s for authentication (AKA trust relationships). I have seen this on quite a few occasions as the sole form of authentication, this is just not good enough as the only means of authentication.
ARP (Address Resolution Protocol)
Use spoofing detection software.
As ARP poisoning is quite noisy. The attacker continually sends ARP packets, IDS can detect and flag it. Then an IPS can deal with it.
Tools such as free and open source ArpON (ARP handler inspection) do the whole job plus a lot more.
There is also ArpWatch and others.
If you have a decent gateway device, you should be able to install and configure Arpwatch.
DNS
Many cache poisoning attacks can be prevented on DNS servers by being less trusting of the information passed to them by other DNS servers, and ignoring any DNS records passed back which are not directly relevant to the query.
DNS Security Extensions does the following for us. You will probably need to configure it though on your name server(s). I did.
- DNS cache poisoning
- Origin authentication of DNS data
- Data integrity
- Authenticated denial of existence
Make sure your Name Server supports DNSSEC.
Referrer

Deny all access by default. Require explicit grants to specific roles for access to every function. Implement checks in the controller and possibly the business logic also (defence in depth). Never trust the fact that certain resources appear to be hidden so a user wont be able to access them.
Check the OWASP Failure to Restrict URL Access for countermeasures and the Guide to Authorisation.
EMail Address
Spoofing of Email will only work if the victims SMTP server does not perform reverse lookups on the hostname.
Key-pair encryption helps somewhat. The headers can still be spoofed, but the message can not, thus providing secrecy and authenticity:
- GPG/PGP (uses “web of trust” for key-pairs)
Application Layer
Used to encrypt an email message body, any file for that matter and also signing.
Email headers not encrypted - S/MIME (uses Certificate Authorities (CAs)(Can be in-house) TLS using PKI)
Application Layer
Used to encrypt an email message body and also signing
Email headers not encrypted
The way the industry is going currently it is looking like the above (same) key-pair encryption will probably be replaced with Forward Secrecy who’s key changes on each exchange.
GPG/PGP and S/MIME are similar concepts. Both allow the consumer to encrypt things inside an email.
See my detailed post on GPG/PGP here for more details.
I have noticed some confusion surrounding S/MIME vs TLS. TLS works at the transport & session layer as opposed to S/MIME at the Application Layer. The only similarity I see is that they both use CAs.
- Adjust your spam filters
- Read your message headers and trace IP addresses, although any decent self respecting spammer or social engineer is going to be using proxies.
- Do not click links or execute files from unsolicited emails even if the email appears to be from someone you know. It may not be.
- Make sure your mail provider is using Domain-based Message Authentication, Reporting and Conformance (DMARC)
- Sender Policy Framework (SPF) is a path-based email authentication technique in which a receiving mail exchange can check that the incoming email originates from a host authorised by the given domains administrators by way of a specially formatted DNS TXT record
-
DomainKeys Identified Mail (DKIM) is a signature-based email authentication technique which also uses a DNS TXT record, the content of which is the DKIM signature, which is comprised of a set of
tag=valuepairs such asd=<sending domain>,p=<public key>, and others, which the receiving mail exchange uses to validate the end-to-end integrity and source of the email message
Website
There is nothing to stop someone cloning and hosting a website. The vital part to getting someone to visit an attackers illegitimate website is to either social engineer them to visit it, or just clone a website that you know they are likely to visit. An Intranet at your work place for example. Then you will need to carry out ARP and/or DNS spoofing. Again tools such as free and open source ArpON (ARP handler inspection) cover website spoofing and a lot more.
Data Exfiltration, Infiltration
There are so many ways to get data in and out of an organisations environment. The following are some of the countermeasures you need to think about when it comes to stopping unauthorised communications entering your network and/or your data leaving your premises, servers or compute.
Dropbox
The options here are to:
- Closely monitor the Dropbox and other file sync tools usage by way of NI[D|P]S as we discussed previously in this chapter
- Block Dropbox and other file sync tools entirely at the firewall
Being aware of how attackers think and what is possible and how easy it is, will help you design your countermeasures.
Physical
We discussed this in the Infectious Media subsection of Countermeasures of the People chapter of Fascicle 0.
Mobile Phone Data
You could ask that people do not use their cell phones, or perhaps leave them at reception. You could block the cell phone signals, but in many countries this is illegal. This is a hard one, do some brain-storming with your colleagues.
DNS, SSH
As usual, defence in depth is your best defence.
Basically just stop all traffic from leaving the target network. Even then though, there are many other ways of getting data in and out of your network.
Run a decent HIDS on vulnerable hosts, as discussed in the VPS chapter under Lack of Visibility in the Countermeasures subsection. This will let you know if the integrity of any existing files on the vulnerable systems have been compromised, along with any important new files being added or removed.
Run anti-virus that leverage’s decent machine learning algorithms, this will increase your chances of being informed when malicious payloads are dropped on vulnerable hosts.
Run a decent NIDS on your network, as discussed in the Lack of Visibility subsection of this chapter, covering both signature-based and anomaly-based analysis/detection.
In most cases the target vulnerable hosts will not have a reason to query TXT
records, and especially in the quantity that are used in DNS tunnelling. Consider blocking them.
Doppelganger Domains
Purchase as many doppelganger domains related to your own domain as makes sense and that you can afford. Do what the attacker does on your internal DNS server. If you are embracing defence in depth, then your attacker will have a much harder time compromising you.
Web-sites
Train users to have their wits about these things. Just being aware that this is a technique used by attackers is often enough
SMTP
Set-up your own internal catch-all SMTP server to correct miss typed domains before someone else does.
SSH
Do not miss type the domain.
Use key pair authentication as discussed, so no passwords are exchanged.
Wrongfully Trusting the Loading of Untrusted Web Resources
Also consider the likes of Consuming Free and Open Source in the Web Applications chapter.
Content Security Policy (CSP)
By using CSP, we are providing the browser with a white-list of the types of resources and from where, that we allow to be loaded.
We do this by specifying particular response headers (more specifically directives).
Names removed to save embarrassment. Sadly most banks do not take their web security very seriously. They seem to take the same approach as credit card companies. At this stage it appears to be cheaper to reimburse victims rather than make sure targets never get victimised in the first place. I think this strategy will change as cybercrimes become more prevalent and it becomes cheaper to reduce the occurrences than to react once they have happened.
'self' secure.reputable.kiwi.bank.co.nz;
connect-src 'self' secure.reputable.kiwi.bank.co.nz;
frame-src 'self' secure.reputable.kiwi.bank.co.nz player.vimeo.com;
img-src 'self' secure.reputable.kiwi.bank.co.nz *.g.doubleclick.net www.google.com www.google\
.co.nz www.google-analytics.com seal.entrust.net;
object-src 'self' secure.reputable.kiwi.bank.co.nz seal.entrust.net;
# In either case, authors SHOULD NOT include either 'unsafe-inline' or data: as valid sources\
in their policies. Both enable XSS attacks by allowing code to be included directly in the d\
ocument itself
# unsafe-eval should go without saying
script-src 'self' 'unsafe-eval' 'unsafe-inline' secure.reputable.kiwi.bank.co.nz seal.entrust\
.net www.googletagmanager.com www.googleadservices.com www.google-analytics.com;
style-src 'self' 'unsafe-inline' secure.reputable.kiwi.bank.co.nz seal.entrust.net;
Of course this is only as good as a clients connection is trusted. If the connection is not over TLS, then there is no real safety that the headers can not be changed. If the connection is over TLS, but the connection is intercepted before the TLS hand-shake, the same lack of trust applies. See the section on TLS Downgrade for more information.
Not to be confused with Cross Origin Resource Sharing (CORS). CORS instructs the browser to over-ride the “same origin policy” thus allowing AJAX requests to be made to header specified alternative domains. For example: web site a allows restricted resources on its web page to be requested from another domain outside the domain from which the resource originated. Thus specifically knowing and allowing specific other domains access to its resources.
You can also evaluate the strength of a CSP policy by using the google CSP evaluator.
Sub-resource Integrity (SRI)
Provides the browser with the ability to verify that fetched resources (the actual content) have not been tampered with, potentially swapping the expected resource or modifying it for a malicious resource, no matter where it comes from.
How it plays out:
Requested resources also have an attribute integrity with the cryptographic hash of the expected resource. The browser checks the actual hash against the expected hash. If they do not match the requested resource will be blocked.
<script src="https://example.com/example-framework.js"
    integrity="sha256-C6CB9UYIS9UJeqinPHWTHVqh/E1uhG5Twh+Y5qFQmYg="
    crossorigin="anonymous"></script>
This is of course only useful for content that changes rarely or is under your control. Scripts that are dynamically generated and out of your control are not really a good fit for SRI. If they are dynamically generated as part of your build, then you can also embed the hash into the requesting resource as part of your build process.
Currently script and link tags are supported. Future versions of the specification are likely to expand this coverage to other tags.
SRI is also useful for applying the hash of the likes of minified, concatenated and compressed resources to the name of them for invalidating browser cache.
SRI can be used right now. Only the latest browsers are currently supporting SRI, but the extra attributes are simply ignored by browsers that do not currently provide support.
Tools such as openssl and the standard sha[256|512]sum programmes normally supplied with your operating system will do the job. The hash value provided needs to be base64 encoded.
TLS Downgrade
There are some great resources listed on the https://httpswatch.nz/about.html page for improving the HTTPS health of your web resources.
HTTP Strict Transport Security (HSTS)
Make sure your web server sends back the HSTS header. If you are using hapijs as your NodeJS web framework, this is on by default, in fact hapi is one of the NodeJS web frameworks that has many security features on by default. This is also fairly straight forward if you are using ExpressJS, but you do need to use helmetjs/hsts to enforce Strict-Transport-Security in Express. For other environments it should be pretty straight forward as well, but do not just assume that HSTS is on by default, read the manual.
Then trust the browser to do something to stop these downgrades.
=31536000 # That's one year.
By using the HSTS header, you are telling the browser that your website should never be reached over plain HTTP.
There is however still a small problem with this. The very first request for the websites page. At this point the browser has no idea about HSTS because it still has not fetched that first page that will come with the header. Once the browser does receive the header, if it does, it records this information against the domain. From then on, it will only request via TLS until the max-age is reached. So there are two windows of opportunity there to MItM and downgrade HTTPS to HTTP.
There is however an NTP attack that can leverage the second opportunity. For example by changing the targets computer date to say 2 years in the future. They are less likely to notice it if the day, month and time remain the same. When the request to the domain that the browser knew could only be reached over TLS has its HSTS max-age expired, then the request could go out as HTTP, but providing that the user explicitly sends it as HTTP without the S, or clicks a link without the HTTPS.
Details of how this attack plays out and additional HSTS resources are linked to in the Attributions chapter.
Online Certificate Status Protocol (OCSP) is very similar to HSTS, but at the X.509 certificate level.
HTTP Strict Transport Security (HSTS) Preload
This includes a list that browsers have with any domains that have been submitted. When a user requests one of the pages from a domain on the browsers HSTS preload list, the browser will always initiate all requests to that domain over TLS. the includeSubdomains token must be specified. Chrome, Firefox, Safari, IE 11 and Edge are including this list now.
In order to have your domain added to the browsers preload list, submit it online at the hstspreload.org. I can not see this scaling, but then not many have submitted their domains to it so far. Just be aware that if you submit your top level domain to the hstspreload list and for some reason you can not serve your entire web application or site over TLS, then it will be unreachable until you either fix it, or remove it from the hstspreload list and it propagates to all or your users browsers.
Domains added to the preload list are not susceptible to the newer SSLStrip2 - dns2proxy attack demonstrated at BlackHat Asia in 2014 by Leonardo Nve
OCSP Must-Staple is very similar to HSTS Preload, but at the X.509 certificate level.
X.509 Certificate Revocation Evolution
This is a condensed version of the evolution.
- Server generates a public key pair
- Keeps the private key for itself
- Gives the public key and some identifying information (domain, etc) to the Certificate Authority (CA) for them to bind to the certificate
End user browses to your website and they get the certificate from your server. The browser verifies that the URL it’s fetched matches one of the URLs in the certificate. Certificates can have wild-cards or a collection of specific sub-domains.
All of the CAs now use intermediate certificates to sign your certificate, so that they can keep their root certificate off line. Similar to what I did with GPG in my blog post. This way if their main signing certificate is compromised, they can revoke it and create another one from their root certificate. You can see the root, intermediate and your certificate as part of the certificate chain when you check the details of a certificate in your browser.
What happened with Heartbleed is that the server’s private keys were able to be located and stolen from RAM before they expired, so those keys had to be revoked. So the attackers that now had the private keys could set-up a cloned website with the stolen private key(s), then divert traffic to the cloned website using the following techniques:
- Phishing (as discussed in the People chapter of Fascicle 0)
- DNS spoofing
- ARP spoofing
- Many other ways
Users would be non the wiser.
Initiative 1: Certification Revocation List (CRL)
When you find that your private key has been compromised or you can no longer trust that it’s still secret.
You tell the CA that created your certificate and bound your public key and identifying information to it.
The CA then adds the serial number of the key your requesting to be revoked to a list they publish.
Now bound into each certificate, including the one you just requested revocation of, is a URL to a revocation list that will contain your certificates serial number if it’s ever revoked.
This URL is known as the Certification Revocation List (CRL) distribution point. Plenty of details can be found in the specification.
So, the browser trusts the certificate by default.
If the browser decides to check the CRL and finds your revoked certificates serial number then it may issue a warning to you.
The certificate can’t be tampered with because if it is, then the signature that the browser knows about wouldn’t match that of the certificate being presented by the web server.
You can check the CRL yourself by just browsing to the CRL distribution point. Then run the following command on the downloaded file to read it as it’s binary.
DER is the encoding
-inform specifies the input format
-text specifies the output format
-in specifies the CRL file you want printed
So what’s happening with the CRLs now is that they are getting larger and larger because more and more entities are using certificates. Now the certificates serial number only stays on the CRL until shortly after the certificate expires, at which point the serial number is removed from the CRL, but even so, because there are more and more certificates being created, the CRLs are getting larger. Of course we only care about one certificates serial number. So the browser fetches this entire CRL file just to find one serial number.
So when you go to fetch a web page over TLS, before the browser will do so, it fetches the certificate from your web server, then downloads the CRL, then looks for your certificates serial number just in case it’s on the list. All this is done before any page is fetched over TLS.
CRLs are generally published daily with a week expiration, you can see this in the CRL that you download. This of course allows a window of opportunity where the browser could still be using a cached CRL even though a new CRL is available from the distribution point with a revoked certificate.
This wasn’t such a big deal in the early days of the internet when there were so few CAs and in many cases the CRL that your browser had already downloaded was useful for many websites that you would visit.
Conscientious CA’s segment their CRLs, so that when you make a request to the CRL distribution point you get back a small list of serial numbers for revoked certificates.
Initiative 2: Online Certificate Status Protocol (OCSP)
The next stage of the evolution was Online Certificate Status Protocol (OCSP) which came about in 1998. Details can be found in the specification. So with OCSP, another extension was added to certificates. Authority Information Access (AIA), whos value contains amongst other things
OCSP Responder: URI: http://<ocsp.specific-certificate-authorities-domain.com>
So with OCSP, instead of querying the CRL distribution point and getting back a potentially large list of certificate serial number revocations, the browser can query the OCSP for the specific single certificates serial number, asking whether it’s still valid.
There have been some proposals to OCSP so that instead of having certificates lasting years, they could instead last only a few days and it be the responsibility of the web server to update the CA with a new certificate every few days. If it failed to do that, then the CA would be presenting an expired certificate, which of course the browser would produce a warning to the user for.
The problem with this initiative was that we have long standing reliance on some long-lived certificates with the likes of pinning. So this short lived type of certificate proposal didn’t stick. You can read more about pinning on the OWASP Certificate and Public Key Pinning page and also the specification.
Details of what An OCSP request should look like can be seen in 2.1 of the OCSP specification. There are plenty of examples around to follow.
Details of what the OCSP response will look like can be seen in 2.2 of the OCSP specification. Notable items of the response are:
- Valid certificate status of
good|revoked|unknown - Response validity interval (How long the response is valid before the OCSP must be re-queried
thisUpdatenextUpdate
The thisUpdate and the nextUpdate define the recommended validity interval. Similar to the same fields in the CRLs, but I think the interval with OCSP is usually much shorter, as the browser only has to send requests for single certificates.
One of the Big Problems
So all CAs now support both CRLs and OCSP. One problem that we’ve seen is that some responses for both CRLs and OCSP have been very slow or non-existent. In which case the browsers have just continued to trust the validity of the certificate. So if the revocation response can be blocked by an attacker, then the browser just continues to trust a certificate that was valid last time it managed to get a response of good.
Initiative 3: Welcome to OCSP Stapling
In the case of OCSP stapling, the web server is responsible for making the OCSP requests to the CA at regular intervals (not per client request)(generally several times per day) rather than the browser. The web server then “staples” the signed time-stamped OCSP response (which generally expires daily) to the certificate supplied as part of the response from the web server to the browser.
The stapled response can’t be forged as it must be signed directly by the CA. If the client does not receive a stapled response from the web server, it just contacts the OCSP itself. If the client receives an invalid stapled response, the connection will be aborted.
If no good response is received, then the certificate will be considered valid until the last signed OCSP response that was received (if one was) expires.
This is a much better solution. Clients can now have assurance that the certificate is currently valid or was valid at some point within the last few hours, which is a much smaller time window for an attacker.
The client no longer needs to contact DNS for the CAs IP address, nor does it have to contact the CA to fetch either a CRL or/and make a OCSP request, as the web server has already done it before the client makes a request to the web server. All the web server needs to do on each request from the client is staple the OCSP response to it’s response. So performance is improved significantly.
You can read the specification for OCSP stapling (officially known as the TLS “Certificate Status Request” extension in the TLS Extensions: Extensions Definitions.
OCSP stapling has been available since at least 2003. Windows Server 2003 onwards all have it enabled by default. Most of the other web servers have it disabled by default.
For the sake of compatibility the browser must initiate the request for stapling. This happens after the transports TCP connection is established. Next the presentations TLS.
Most web servers currently on the internet don’t support OCSP stapling, because it’s off by default on most non windows servers.
The following websites will tell you if a website supports OCSP, CRL, OCSP stapling and lots of other goodies:
OCSP Stapling Problem
The client doesn’t know whether the web server supports OCSP stapling or not. When the client asks if it does, the legitimate web server may support stapling, but the fraudulent web site that the client may be dealing with just says “no I don’t support stapling”. So the browser falls back to using OCSP or CRL.
Initiative 4: Fix to the OCSP Stapling Problem
OCSP Must-Staple now provides us with hard-fail. The idea with this is that when you submit a certificate request to the CA, there will be an option for “must staple”. Not sure of what it’s actually going to be called yet. So if you request your new certificate to have the “must staple” option listed on it, it can’t be removed by an attacker because again that would break the signature that the browser knows about.
So how this now plays out: The browser on its first request to the web server, tells the web server that it supports stapling and if the web server can provide a certificate with a stapled OCSP response, then we want it. The web server then responds with the certificate that has the “must staple” cryptographically bound to it. Now if the web server being an illegitimate server says “no I don’t support stapling”, the browser won’t accept that, because the “must staple” is part of the certificate.
There are two ways that the “must staple” are being looked at for solution. The OCSP Must-Staple section of the article with the same name on the casecurity.org blog provides details.
- In the certificate as discussed above
- An interim solution that TBH, doesn’t look like much of a solution to me. It is to add a
Must-Stapleheader to the response, which of course can easily be stripped out by a MItM on the very first response. This solution is very similar to HSTS that I discussed above. Of course if you want similar behaviour to the HSTS Preload also discussed above, then the “must staple” must be part of the certificate.
As far as I know Firefox and Chrome are both working toward implementing Must-Staple in certificates, but I haven’t seen or heard anything yet for Internet Explorer.
4. SSM Risks that Solution Causes
Fortress Mentality
Not allowing any work devices to be taken from the premises is a fairly archaic technique that is likely to significantly negatively impact the business, as business’s want their travelling sales people and even their developers, engineers to take their work home and work in the evenings and weekends.
Having a separate wireless network for your workers to access the internet is not sufficient for them to get their work done.
All of the technical solutions are costly, but they are only part of the solution.
Lack of Segmentation
If you make it harder for a determined attacker to compromise your network resources, they may change tack to exploiting your people or what ever is now easier. When you lift the low hanging fruit, then some other fruit becomes the low hanging.
By fire-walling your network segments gateway interface and having to think about everything that should be permitted safe passage out of the given network segment imposes restrictions. I often find people expecting to be able to access something via the network segments gateway interface but unable to because it has not been explicitly allowed.
Applications exist that continue to target random ports to be able to function, the real-time chat application Discord is one of those. These can be a real pain for keeping a tight gateway interface if the application is mandatory to use.
Lack of Visibility
The following are some of the risks that the mentioned solutions may cause.
Insufficient Logging
With the test cases we set-up, there was no ideal solution, it would be a matter of choosing the options that worked the best for you, or finding something else that worked.
Lack of Network Intrusion Detection Systems (NIDS)
As mentioned in the Countermeasures section, there are some pros and cons of signature vs anomaly based detection techniques. Choosing a tool-suite that uses both can help mitigate the risks discussed. You will also need to weigh up what each product offers in terms of features and how mature it is etc, and what the risks of each would be to your environment and business.
Spoofing
Most of the spoofing mitigations don’t introduce a lot of risk.
IP
The only risks that spring to mind is the additional complexity that will be added to your router configuration.
ARP (Address Resolution Protocol)
The only risks that spring to mind is the additional complexity that will be added to your IDS configuration.
DNS
The only risks that spring to mind is the additional complexity that will be added to your name servers configuration.
Referrer
No risks if you work out who should be able to access what and make the appropriate code changes.
Data Exfiltration, Infiltration
Dropbox
There will be NI[D|P]S configuration required to monitor file sync tools such as Dropbox which is extra work and depending on how Dropbox is used may just fail. Blocking file sync tools may be an option,
Physical
As per the Infectious Media subsection of Risks that Solution Causes of the People chapter of Fascicle 0.
Mobile Phone Data
In most cases, what ever you do to stop cell phone signals escaping your premises, servers or compute, is either going to be ineffective, or significantly disadvantage your organisation, both in terms of productivity and morale. Since when have attackers played by the rules of their victims?
DNS, SSH
Employees will always find a way to get around organisational policy if it stops or slows their work down.
It can be a lot of work to have HIDS running on all systems, and is impractical.
Not all anti-virus is created equal. The next generation anti-virus with machine learning is expensive.
NIDS set-up and administration takes a lot of work for any security operations team. Often organisations will out source this.
There may be a legitimate reason for allowing DNS TXT records, obviously you will not be able to block them if that is the case.
Doppelganger Domains
There are no real risks with acquiring domains.
Wrongfully Trusting the Loading of Untrusted Web Resources
Content Security Policy (CSP)
Trusting the (all supported) browser(s) to do the right thing.
Don’t. Remember defence in depth. Expect each layer to fail, but do your best to make sure it does not. Check the likes of the OWASP How Do I Prevent Cross-Site Scripting for taking the responsibility yourself rather than deferring to trust the clients browser.
Take care in making sure all requests are to HTTPS URLs. You could also automate this as part of your linting procedure or on a pre-commit hook on source control.
Make sure your web server only ever responds over HTTPS, including the very first response.
Sub-resource Integrity (SRI)
Similar to the above with trusting the browser to support the SRI header. All requests should be made over HTTPS. The server should not respond to any requests for unencrypted data.
Take care in making sure all requests are to HTTPS URLs. You could also automate this as part of your linting procedure on a pre-commit hook or source control.
Make sure your web server only ever responds over HTTPS, including the very first response.
TLS Downgrade
HTTP Strict Transport Security (HSTS)
Unless the browsers know about your domain and have it added to their HSTS Preload list, then the connection is still not safe on the very first request, unless your server refuses to serve without TLS, which should be the case.
HTTP Strict Transport Security (HSTS) Preload
Ultimately, if you have done you job correctly, you are trusting the browser to honour your decision to not communicate at all unless TLS is supported.
If you make sure your web server only ever responds over HTTPS, including the very first response then the HSTS preload may work for you, just beware that once your domain is in the list, it is only reachable over HTTPS
5. SSM Costs and Trade-offs
Fortress Mentality
Your workers still need to connect to the corporate LAN. So put policies in place to make sure what ever they connect:
- Has a local firewall enabled and configured correctly to cover ports to possibly insecure services
- Must be fully patched
- Anti-virus on systems that need it and rule sets up to date
- Ability to authenticate itself, what ever technique you decide to use
The technical solutions described are costly, but building a motivated and engaged work force is not, it just requires a little thought and action on behalf of those in charge.
The best you can do is care and show you care for your workers. This all comes back to what we discussed in the People chapter of fascicle 0 around engaged and well looked after workers.
Your people will be your weakest or your strongest line of defence, it is up to you.
Lack of Segmentation
Depending on your scenario, threat model and determine what the next lowest hanging fruit is and harden or remove that attack surface and just keep working your way up the tree.
If you can explain why you have tight egress rules, people will usually be accepting.
If you are constrained to use software that insists on changing what port it wants to communicate on, discuss this along with the perils of leaving large port spaces open with those mandating the tool. If you can not have the tool configured to communicate on a specific port and you do not get any traction with changing the tool, at least lock the outbound port space down to specific hosts and protocols.
Lack of Visibility
The following are some costs and trade-offs for lack of visibility. Your mileage may vary. As noted below, this is one area that moving your business to the cloud frees up a lot of work you would have to do otherwise.
Insufficient Logging
Any of the options I detailed would take time to set-up, depending on the size of your network and considering what you are protecting will help you decide which of the options would work the best, or investigate some other options.
This is one area that moving to the cloud makes sense, let your cloud provider take care of the infrastructure, and you make sure you have your configuration and application security water tight.
Lack of Network Intrusion Detection Systems (NIDS)
Most of this should have been covered in the Countermeasures section.
Spoofing
It’s really up to you to weigh up how much time you should spend on the solutions.
Data Exfiltration, Infiltration
Dropbox
You will need to weigh up whether stopping file sync tools will damage productivity and by how much.
Physical
As per the Infectious Media subsection of Costs and Trade-offs of the People chapter of Fascicle 0.
Mobile Phone Data
There are many scenarios to be considered here.
DNS, SSH
Strike a balance between security and pragmatism.
You should consider having HIDS running on critical servers. Depending on your security requirements, you could extend these to other work stations, but this increases the administrative overheads.
In many cases, the extra expense of the newer anti-virus products is worth the expenditure. You will have to weigh this up.
Setting up and maintaining a NIDS is pretty much a given for any medium to large sized business’s network. There are many arguments around whether an organisation should run their own in house security operations team. This will often come down to the size of the organisation, whether or not you already have some of the specialities required in house, what your assets are, who your adversaries are, how long you plan on existing, and many other considerations. This is all part of your threat modelling.
You could inspect the DNS records, this is where your NIDS comes in.
Doppelganger Domains
Weigh up what your attack surface looks like in terms of doppelganger domains, acquire domains with obvious similarities that users could mistakenly type. weigh up where to stop purchasing the doppelganger domains.
Wrongfully Trusting the Loading of Untrusted Web Resources
Content Security Policy (CSP)
Any countermeasure costs here are fairly trivial.
Sub-resource Integrity (SRI)
Any countermeasure costs here are fairly trivial.
TLS Downgrade
HTTP Strict Transport Security (HSTS)
Make sure your server only serves responses over HTTPS.
HTTP Strict Transport Security (HSTS) Preload
It may make sense to not add your domain to the preload list, but make sure that resources from your domain are not accessible unless over HTTPS. There are many ways to do this.